
 Pictured above are an assortment of folded star books. From left to right; pages made from colored construction paper & covers made from Chili's coasters, printer paper pages with covers using decorative paper and a turquoise bead embellishment, a typography journal made with printer and decorative papers, a gift from my friend Erin - made by Jen Swearington of Jenny Threads with ketchup artwork for the covers, and finally the little book featured in my last post.
The following is a tutorial for making these fun books. They can be made in any size, but if you use the dimensions that I provide, a basic printer paper can be used for the pages. Have fun, and please let me know if you have any questions!
 Creating the Basic Structure
Using a sharp blade such as an Xacto or an Olfa utility knife, cut out two 4¼ x 4¼ inch squares from a piece of board (binders board, cereal box, any board will work). Be aware of what is underneath the board while you cut. If available use a cutting board or self healing mat. These two pieces will be your covers.
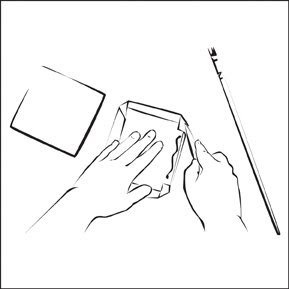 Making the Covers
Cover these two board pieces with paper or fabric. Use an adhesive appropriate to your cover material. Mix (PVA & Methyl Cellulose), Paste, Glue Stick, and HeatnBond are all acceptable. I like to brush Mix onto the paper and then place the paper onto the board. Use a bone folder to smooth cover material onto boards.
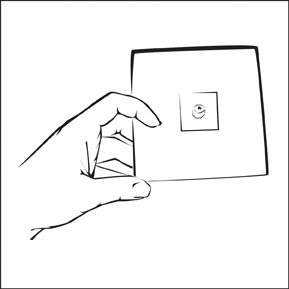 Adding Embellishments
You may add a decorative element to one of the boards to create a distinction between the front and back covers. Use contrasting paper, beads, or found objects to create this sense of a cover.
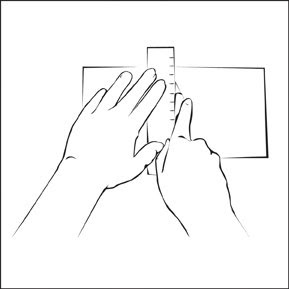
 Folding Paper
Fold an 8½ x 8½ inch piece of paper three times. From one corner to the opposite corner create a diagonal fold. Flip the paper over and then continue from the left side to the right side creating a vertical fold, and from the top to the bottom creating a horizontal fold. A bone folder will help create crisp folds.
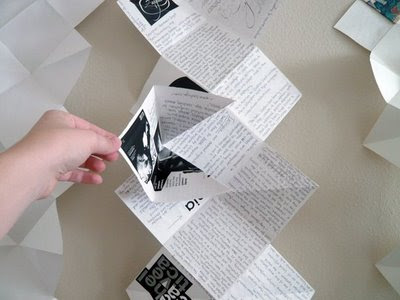
 Creating the Book BlockPlace your pages in front of you so that your diagonal fold is vertical. Next, flip every other piece onto the opposite side. Adhere the folded pages one to another in an alternating manner. A glue stick may be used for this, a thin even coat of adhesive is desired. When all of the pages are connected, this is called a book block.
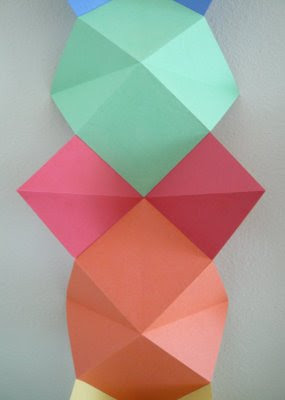 This construction paper version is a good example of how the pages should be attached.
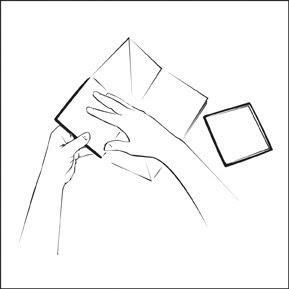 Completing Your Book
One at a time, adhere the front and back covers to the endpapers of the book block. Be careful to align the covers evenly. The book should be able to stand on its own when dry. A glue stick or the PVA and Methyl Cellulose mixture may be used for this.
 After you finish your book, if you find that you need more pages, no problem! Just fold another page and glue it in -- as I did in my typography journal (above).